Cheese
Chicken Enchiladas
What:
Chicken Enchiladas
Recipe By:
teppij
Why:
Chicken enchiladas are a lighter version of beef enchiladas while having great flavor!
The Recipe:
Ingredients:
- 1 tablespoon butter
- 1/2 cup chopped green onions
- 1/2 teaspoon garlic powder
- 1 (4 ounce) can diced green chiles
- 1 (10.75 ounce) can condensed cream of mushroom soup
- 1/2 cup sour cream
- 1 1/2 cups cubed, cooked chicken breast meat (about 2 chicken breasts)
- 1 cup shredded Cheddar cheese, divided
- 6 (12 inch) flour tortillas
- 1/4 cup milk
Directions:
- Preheat oven to 350 degrees
- Lightly grease a 9″ x 13″ baking pan
- In a medium saucepan, over medium heat, melt the butter and saute the green onion until tender, about 3 to 4 minutes

- Add the garlic powder, then stir in the green chiles, cream of mushroom soup, and sour cream
- Mix well
- Reserve 3/4 (about 1 1/2 cups) of the sauce and set aside
- To the remaining 1/4 of the sauce in the sauce pan, add the chicken and 1/2 cup shredded Cheddar cheese
- Stir together
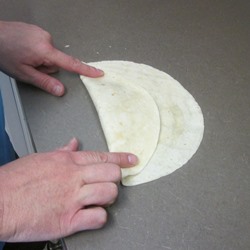
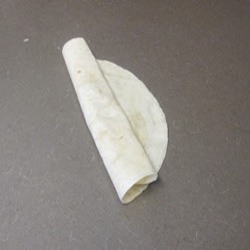
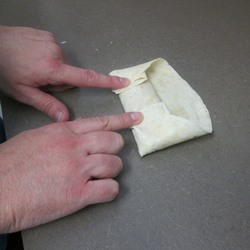
- Fill each flour tortilla with the chicken mixture
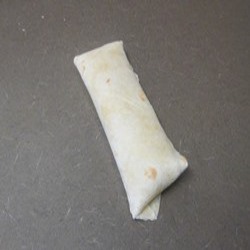
- Roll up tortillas
- Place, seam side down, in the prepared baking pan
- In a small bowl, combine the reserved sauce with the milk
- Spoon mixture over the rolled tortillas and top with remaining cheese
- Bake in preheated oven for 30 to 35 minutes or until cheese is bubbly
- Let stand for a few minutes
- Enjoy!
Variations:
If you’d like a lower fat alternative (which is what I opted for) I used low fat sour cream, which reduced the overall fat content slightly. Using this change didn’t seem to affect the flavor at all. I also used yellow onions instead of green onions as my wife and I don’t really care for green onions. Another change I made was to use minced garlic, I like to, as much as I can, use non-powdered spices, since it seems better to me for some reason. I don’t have any science to back that up, just a personal preference. To reduce the fat and sodium even more, you could also use the low fat/low sodium cream of mushroom soup. I’m not sure how much that would affect the flavor or the consistency of the sauce, as fat makes the sauce smoother, but it’s worth a try!
Review:
I really like this recipe a lot! I thought it was very easy to prepare and it came out exactly how I thought it would. I also thought the flavor was very rich and the sauce was creamy and cheesy, without being spicy at all. The tortilla might be a bit much, but I really like bread, so it didn’t bother me that much. You could use the medium sized flour tortilla shells to reduce the amount of bread/carbs, if that is a concern. As I was making the enchiladas, it didn’t seem at first like there would be enough filling, especially when I scooped the filling into the shells and there really didn’t seem like it would very substantial. To my surprise though, it was the perfect amount and one enchilada was very filling. If you want a simple, quick, and great tasting alternative to beef enchiladas, give this one a try!
Hopefully you found this recipe easy to follow and understand. Please feel free to leave a comment and let me know your thoughts on this recipe. Keep cooking with courage!
Follow my Facebook page for further recipes and ideas at Culinary Courage!
Stove-top Mac and Cheese
What:
Stove-top Mac and Cheese
Recipe By:
Alton Brown
http://www.foodnetwork.com/recipes/alton-brown/stove-top-mac-n-cheese-recipe/index.html
Why:
I wanted to find and make a good macaroni and cheese that was easy enough to replace the boxed stuff. This recipe seemed to fit the bill.
The Recipe:
Ingredients:
- 1/2 pound elbow macaroni
- 4 tablespoons butter
- 2 eggs
- 6 ounces evaporated milk
- 1/2 teaspoon hot sauce
- 1 teaspoon kosher salt
- Fresh black pepper
- 3/4 teaspoon dry mustard
- 10 ounces sharp cheddar, shredded
Directions:
In a large pot of boiling, salted water, cook pasta to al dente and drain – (al dente means that the noodle should be a little firm have a little resistance when you bite into them. This would mean to cook them a minute or two less than the suggested time)
Return to the pot and melt the butter, toss to coat
Whisk together the eggs, evaporated milk, hot sauce, salt, pepper, and mustard
Stir into the pasta and add the cheese
Cook over low heat for about 3 minutes, until cheese is melted and creamy
Enjoy!
My Review:
Okay, I have to be honest. I really didn’t like this recipe. I still posted it because, just because I didn’t like it, that doesn’t mean you might not. As I was eating it, it felt like I was taking a bite out of a hunk of cheddar cheese. The sauce was creamy and the texture was really good, it just had an overwhelming cheese flavor. I think if I were to make this again, I would maybe mix a couple cheeses together, like half cheddar and half Monterrey Jack, to even out the flavor. I think also, if you are really used to the boxed stuff, this will be much different, as the ingredients are “real” and fresh. I would say give this a try, but be prepared for a big cheese flavor.
Final Thoughts:
This wasn’t the recipe I was looking for, but that doesn’t mean that this was a bad recipe. I’ll keep looking for and trying new recipes and maybe find something that fits my taste a little better. I’m a pretty picky eater, so maybe I was just too sensitive to the cheese flavor. On another note, I would suggest making this for an occasion where you know it will all be eaten during that meal. It didn’t reheat well, or maybe I just didn’t know how to reheat it properly. Again, I would give this one a try again with a mix of cheeses.
Hopefully you found this recipe easy to follow and understand. Please feel free to leave a comment and keep cooking with courage!
Cheesy Garlic Bread
What:
Cheesy Garlic Bread
Recipe By:
America’s Test Kitchen
Why:
This garlic cheese bread will make you wonder why you ever bought the pre-made, frozen, store bought cheese bread!
The Recipe:
Ingredients
- 5 medium garlic cloves, peeled and grated
- 8 tablespoons (1 stick) unsalted butter, softened
- 1/2 teaspoon water
- 1/4 teaspoon salt
- 1/4 teaspoon ground black pepper
- 1 (18- to 20-) inch baguette, sliced in half horizontally
- 1 1/2 cups shredded Italian Cheese blend
Directions
- Adjust an oven rack to the lower-middle position
- Heat oven to 400 degrees
- Combine garlic, 1 tablespoon of the butter, and the water in a small, nonstick skillet
- Cook garlic mixture over low heat until straw colored, about 7 to 10 minutes
- Mix the hot garlic, remaining butter, salt and pepper in a bowl
- Spread the butter evenly on the cut sides of the bread
- Sandwich the bread back together and wrap loaf in foil
- Place on baking sheet and bake for 15 minutes
- Carefully unwrap the bread and place the sides, butter side up, on a baking sheet
- Bake until just beginning to color, about 10 minutes
- Remove from the oven and set the oven to broil
- Sprinkle the bread with cheese
- Broil until the cheese has melted and the bread is crisp, 1 to 2 minutes
- Transfer the bread to a cutting board with the cheese side facing down
- Cut into pieces
- Enjoy!
Explanation of some of the steps:
There are a couple steps that I thought might need some further explanation. This is something I just started with this post, so if you have more questions about this, or any recipe or post I make, please feel free to ask in the comments or on my Facebook page at: https://www.facebook.com/pages/Culinary-Courage/605394059498877
The first being, why cook the garlic in butter?
Well, cooking the garlic enhances it’s flavor in a good way. Though it may seem like five garlic cloves is a lot of garlic, it really turns out to be the perfect amount. You will certainly taste the garlic, but you won’t be overpowered by it.
Secondly, cutting the bread with the cheese side down?
Yes, this does seem like the cheese would stick to the cutting board, ruining all your hard work! But, oddly enough, there is a reason for doing this. You are able to cut the bread in nice slices without tearing the cheese in the process, and trust me, the cheese will not stick to the board at all.
My Review:
I really, really love this cheese bread, it is much easier to make than it looks, so don’t be deterred by the amount of instructions. It’s a great compliment to any Italian dish, or even pizza! It has a nice, rich, cheesy flavor without the garlic being overwhelming. The bread itself is crunchy on the outside and chewy on the inside. It’s a perfect mix of flavor and texture!
Final Thoughts:
Once I made this recipe, my wife and I rarely buy the store made stuff. I’m certainly not against the store bought bread, but I think you’ll be a convert to this bread once you give it a try!
I hope you found this recipe easy to follow and understand. Please feel free to leave a comment and keep cooking with courage!
Lasagna
What:
Lasagna
Recipe by: Kim and Chad E.
Why:
This is a very easy, relatively quick, delicious lasagna recipe. When my wife and I have a hankering for some lasagna, we make this one! Ditch the frozen, chemical filled lasagna and make a delicious, homemade one instead!
The Recipe:
Ingredients:
1 package of no boil lasagna noodles
1/2 – 1 pound ground beef (we don’t like a lot of meat in the recipe so we use a half pound, but if you like beef, add more!)
1 small onion, chopped
1 garlic clove (I almost exclusively use minced garlic you can buy in a jar. If you use that, put about 1 to 2 teaspoons in)
Salt and Pepper
1 egg
2 cups cottage cheese
2 cups mozzarella cheese
1 23.5 ounce jar of spaghetti sauce (I use Prego Traditional style sauce)
Parmesan cheese (optional)
9″ X 9″ baking pan
Directions:
Set oven to 425 degrees
In a medium skillet, add onion, beef, salt and pepper to taste, and garlic
Cook and chop beef until beef is desired size and cooked through

While the beef is cooking take out two medium bowls
In one bowl, mix together the cottage cheese, 1 1/2 cups of mozzarella cheese, the egg, and parmesan cheese (if desired)

In the other bowl, add pasta sauce and cooked beef mix

Put a couple spoonfuls of sauce on the bottom of the baking pan, this will keep the noodles from sticking to the bottom of the pan
Place the first layer of noodles down

Place a few spoonfuls of sauce on the first layer, spread it around as evenly as possible, fully covering the noodles
Place a few spoonfuls of the cheese over the sauce, mix it around so the cheese and sauce are blended and covering the noodles

Place the second layer of noodles so that they are perpendicular to the first layer

Add the cheese and sauce like the previous direction
Repeat until you are out of noodles (I was able to get four layers, if you don’t like is at noodly, add more sauce and less layers of noodles)
Spread any remaining sauce and cheese you may have on the top layer
Take the remaining mozzarella cheese and sprinkle it over the sauce
The final product before baking should look something like this
Place lasagna in oven for 35 – 40 minutes (Ovens vary, so it may take longer for some)
Bake until top layer of cheese is golden brown and sauce is bubbling
Remove from oven and let rest for 10 minutes (This lets everything settle and it makes it easier to cut)
Enjoy!
Cost:
This recipe is fairly inexpensive, especially since it makes enough for a couple meals. I purchased all the ingredients and the total was around $10.
Variations:
If you don’t like a lot of noodles, follow the directions as shown, and just add more sauce to each layer and use the desired layers of noodles, but still cook it the same way.
Review:
My wife and I love this recipe. It’s very simple and doesn’t take too long to make, in total maybe an hour, and more than half of that is the lasagna cooking in the oven. This recipe also doesn’t need any fancy equipment, just a skillet, a square pan, a spoon, and an oven. It has a great flavor and it is very filling too! Try this one out for a great, homemade Italian dinner.
Calzones
What:
Calzones
Recipe by: Dawn E
Why:
Because who doesn’t like a stuffed pizza! But really, this is a very good recipe I got from my mom a few years back. I’ve only altered the recipe slightly to give it a little more flavor, though I’m still working on it.
The Recipe:
Ingredients:
Crust Ingredients
- 1 pkg. active dry yeast
- 1 cup warm water
- 1 tbsp. sugar
- 2 tbsp. vegetable oil
- 1 tsp. salt
- 2 3/4-3 1/4 cups flour
Filling Ingredients
- 1 (8 oz.) can tomato sauce
- 1 tsp. basil
- 1 tsp. oregano
- 1 garlic clove, minced
- 1 cup mozzarella cheese
- 1 beaten egg
- Desired toppings: pepperoni, sausage, mushrooms, whatever you like! Just make sure you have enough for six calzones.
I’m going add here that for the crust directions, if you have a stand mixer, use that, it makes the process significantly easier! So for these directions in parentheses I’ll put the speed that I used when I made the crust. Otherwise using a spatula will work just fine.
Crust Directions
In a large bowl, dissolve yeast in warm water
Stir in sugar, oil, salt, and 1 cup flour (Start on mixer speed low, then move speed up to 2 or so)
Beat until smooth
Mix in enough remaining flour, until dough is easy to handle (If you have a kitchenaid mixer, level 2 to 4)
Remove dough on lightly floured surface
Knead dough until smooth and elastic
Place dough in grease bowl, spray top of dough with cooking spray to keep moist
Cover dough and let rise until doubled
Once doubled, punch down dough (Punching the dough removes air pockets and gets it ready to be rolled out)
Remove dough and divide into 6 equal parts (I formed a long, uniform log, to get the most equal parts that I could)
Roll into 7″ circles on lightly floured surface (When rolling, place the rolling pin in the center of the dough portion and gently roll out. Then roll the other side. Turn the dough 90 degrees and repeat the process until you have your circles)
Filling Directions
Set oven to 375 degrees
Mix together tomato sauce, basil, oregano, and garlic
Spread mixture over half of each dough circle
Top with the toppings of your choice
Carefully fold dough over toppings and pinch edges to seal (Pinch firmly as they tend to split open if not completely sealed)
Place on greased baking sheet (I actually didn’t do this and my pan isn’t non-stick and they came off just fine, but if you really want to do this, go for it)
Let rest for 15 minutes
Brush each Calzone with egg
Sprinkle with Parmesan cheese and, if you have it, Italian seasoning (This is an optional thing to do. I like it for the little extra flavor)
Bake for 25 minutes or until golden brown
My Thoughts/Variations:
To start off, the only variation that I added was the final step of sprinkling the Parmesan cheese and Italian seasoning on top of the Calzone. I also cooked the sauce before spreading over the crust. I think this marries the flavors of the sauce and makes it that much better, of course, this is optional as the sauce will cook while baking. I really like this recipe as it feels good to know where all of your ingredients came from and nothing is pre-made, sitting in a freezer or wherever. It does take some time, as the dough has to sit and rise and rest, but it is well worth the time and effort! The dough is pretty easy and a great way to start learning the basics of bread making.
Review:
Though this takes a little time, it’s well worth it. Instead of spending too much at the local pizza place, give this one a try, you may find you won’t order pizza as often :).


